
TL;DR
In small spaces like closets, placement and strategic acoustic treatment matter more than expensive gear. Moving your rig away, sealing gaps, and controlling reflections create a much cleaner sound, often more than foam or soundproofing alone.
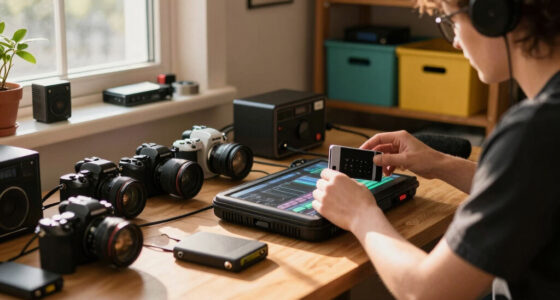
Ever tried recording vocals in a tiny closet, only to get a muddy, boxy sound that makes you cringe? It’s a common story. The truth is, your setup’s success depends more on where you place your gear and how you treat the space than on fancy foam or costly equipment.
This guide reveals the secrets behind making a closet work for voice and video, focusing on smart placement, effective acoustic strategies, and the surprising power of the ‘rig in the closet’ setup. Whether you’re a streamer, podcaster, or home studio enthusiast, these tips will help you get a professional sound without turning your tiny room into a soundproof bunker.
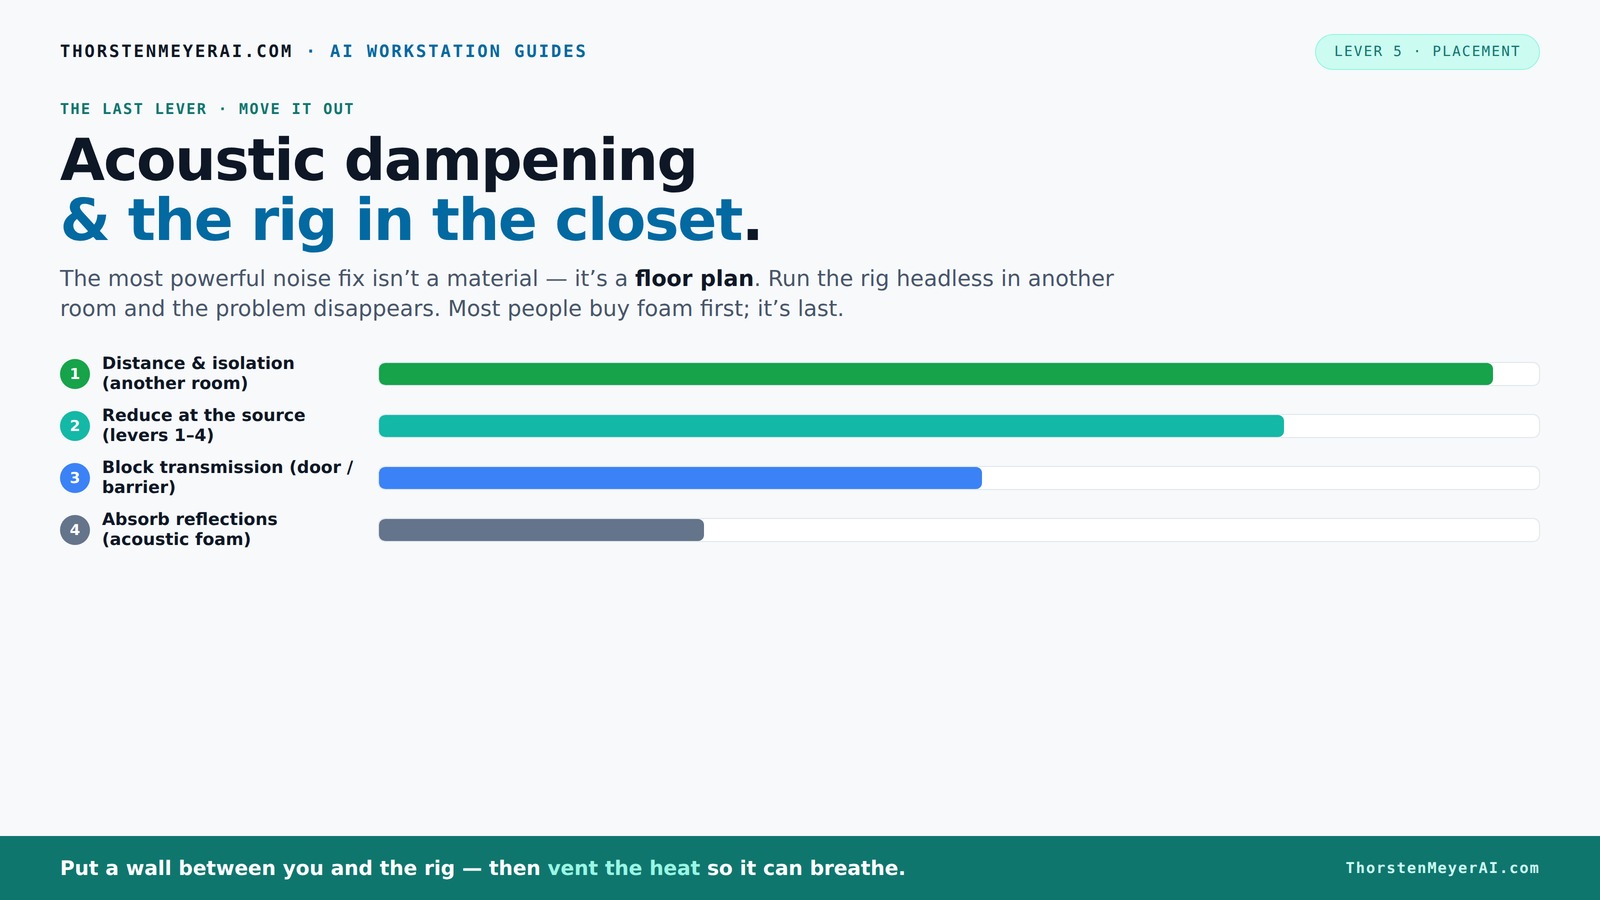
Acoustic dampening
& the rig in the closet.
The most powerful noise fix isn’t a material — it’s a floor plan. A rig you can’t hear because it’s in another room beats any amount of foam. Tap the approaches in Part 1 to see what actually works.
(another room)
(levers 1–4)
(door / barrier)
(acoustic foam)
Contain the noise, not the heat
Key Takeaways
- Moving your rig into another room or closet reduces noise and reflections more than any foam or treatment.
- Proper ventilation is critical when placing a computer in a sealed closet—use fans and ducting to keep temperatures stable.
- Acoustic dampening reduces echo, but soundproofing stops leaks—both are essential in a small closet setup.
- Placement of panels at reflection points maximizes their effectiveness—cover walls and ceiling, not just corners.
- Sealing gaps and covering hard surfaces with rugs or blankets instantly improves clarity and reduces muddy sounds.

Focusound 52 Pack Acoustic Foam Panels 1" x 12" x 12" Sound Proof Foam Panles Soundproofing Noise Cancelling Wedge Panels for Home Office Recoding Studio with 300PCS Double-Side Adhesive
Soundproofing - Acoustic foam panels triangular grooves structure for better noise absorption, helps to reduce and absorb unwanted...
As an affiliate, we earn on qualifying purchases.
As an affiliate, we earn on qualifying purchases.
Why Moving Your Rig Is the Biggest Win for Sound Quality
The biggest difference in your sound comes from distance. When you put your rig in another room or closet, you cut down on the noise and reflections bouncing back into your mic. This is crucial because close proximity can amplify unwanted noise and reflections, creating a muddy and unfocused sound. Moving your gear away helps isolate your voice from background noise and reduces the amount of sound waves bouncing around, which can cause echo and reverb.
Imagine having your PC or audio interface in a closet across the hall. You still control it remotely, but the noise stays hidden. This simple move can cut your room noise by over 80%, according to DIY tests. Furthermore, it prevents the rig’s internal fan noise or hard drive sounds from seeping into your recordings, which is especially important for clean, professional audio. The tradeoff is convenience versus sound quality, but for many, the benefits far outweigh the minor inconvenience of remote operation.
For example, I set up my AI training server in a closet. My recording booth stayed silent, even as the rig roared in the background. All I had to do was connect via network—no more noise leaks or echo. This demonstrates how spatial separation not only improves audio clarity but also gives you a quieter, distraction-free workspace.

Foroomaco Triangular Pyramid Bass Traps for Ceiling Corners, 4 Pack, Black
Purpose-Built for Trihedral Ceiling Corners – Designed for the three-surface junction where two walls meet the ceiling, placing...
As an affiliate, we earn on qualifying purchases.
As an affiliate, we earn on qualifying purchases.
The 'Rig in the Closet' Setup — How to Make It Work Without Overheating
Placing a hot, high-load computer in a closet sounds like asking for trouble — and it is, if you don’t ventilate properly. Overheating can cause hardware failures, noise from cooling fans, and even fire hazards. However, with thoughtful airflow management, you can keep your rig cool and quiet while maintaining the benefits of a closet setup.
Start with active ventilation: install a quiet exhaust fan at the top of the closet, which pulls hot air out, and an intake vent at the bottom to bring in cooler air. You can learn more about cooling a rig in a small space. This creates a gentle, continuous airflow that prevents heat buildup without creating drafts or noise that could be picked up by your mic. The goal is to mimic natural convection—hot air rises and escapes, while cooler air enters naturally or via ducting.
For example, a DIY streamer I know built a sealed closet with a small vent, a 120mm fan, and duct hoses—kept the temperature stable while muffling the noise. The key tradeoff here is balancing airflow with soundproofing; too much ventilation can introduce noise or leaks, so choosing quiet fans and sealing other gaps is critical. Serious soundproof cabinets designed for computers offer integrated cooling and sound absorption, but for DIY solutions, strategic vent placement and quiet fans are your best bet. Check out this guide for more on cooling a rig in a small space.

TroyStudio Portable Vocal Booth, Large Foldable Microphone Isolation Shield, Music Recording Studio Sound Echo Absorbing Box, Desk & Stand Use Reflection Filter with Thickened Dense Acoustic Foam
【BASIC INFO】: Inside size after setup: 8'' (L) X 10'' (W) X 12'' (H), large space for various...
As an affiliate, we earn on qualifying purchases.
As an affiliate, we earn on qualifying purchases.
Acoustic Dampening vs. Soundproofing: What You Really Need
Many folks confuse soundproofing with acoustic dampening. Here’s the quick breakdown: acoustic dampening reduces echoes and reflections inside your space—making it sound less boxy. It’s about controlling the internal acoustics so your recordings are clear and focused. Soundproofing, on the other hand, aims to block sound from escaping or entering—preventing outside noise from contaminating your recordings and vice versa. Both are important, but they serve different purposes.
In a closet booth, your primary goal is often to improve sound clarity by reducing internal reflections. To do that, focus on covering walls, ceiling, and door gaps with soft materials like foam panels, blankets, or acoustic tiles. These materials absorb sound waves, preventing them from bouncing around and creating echo. You can find more about acoustic dampening and placement.
If outside noise leaks in, sealing gaps and adding mass—like a heavy curtain or extra drywall—becomes necessary. Think of dampening as treating the inside of your room, while soundproofing is about sealing it off from the outside world. Both are essential for a professional-sounding setup, but prioritize dampening if your main concern is internal echo and clarity, and add soundproofing if external noise is a problem.
For example, sealing cracks around the door with weatherstripping and adding a thick curtain can cut noise leaks by up to 50%. Meanwhile, placing bass traps in the corners helps tame low-end rumble that makes recordings muddy. Check out [this article](https://soundproofcow.com/how-to-soundproof-closet/) for a deep dive into the differences.

Rigych Microphone Isolation Shield, 3 Panels Sound Proof Mic Shield with Mic Stand and Pop Filter, High Density Absorbent Foam Mic Isolation Shield for Recording
Double Noise Reduction - The microphone shield made of 3 panels of high-density acoustic foam in a 3-layer...
As an affiliate, we earn on qualifying purchases.
As an affiliate, we earn on qualifying purchases.
Where to Place Absorbers, Foam, and Blankets for Best Results
Placement is everything. Acoustic dampening doesn’t work if you randomly stick foam panels anywhere. Instead, position your treatment at the reflection points—those spots where sound bounces directly into the mic. For detailed tips on placement, see this guide on acoustic placement.
For vocals, focus on the wall behind the mic and the ceiling. Use a mirror trick: hold a mirror flat against the wall near your microphone, and see where the sound reflects from. Place panels at those points to catch the reflections before they reach your mic. This targeted approach improves clarity and reduces unwanted room sound.
In small closets, covering most of the walls and ceiling with absorption material is more effective than just a corner trap. For example, a DIY vocal booth I built used thick blankets on the door and foam panels on the ceiling, drastically reducing echo and boxiness. The key is strategic placement—think of your space as a system where each absorber controls a specific reflection path. Check out [this guide](https://www.soundassured.com/blogs/blog/turning-a-closet-into-a-vocal-booth-the-benefits-and-drawbacks-of-small-spaces) for more placement tips.
Coverage Over Patches: How Much Material Do You Need?
Trying to soundproof a closet with just a few foam panels is like trying to block a river with a handful of sand. Coverage matters because the more surface area you treat, the more sound waves are absorbed, and the less echo and reverb you'll experience. Insufficient coverage leaves gaps that allow reflections to bounce around, muddying your recordings.
Experts recommend covering at least 50-70% of the walls and ceiling with absorptive material for noticeable improvements. This coverage ensures that sound waves are absorbed effectively across the entire space, reducing flutter echoes and standing waves. Layering blankets, foam, and rugs on the floor creates a deadened environment without feeling claustrophobic or overly dampened.
For example, a streamer I follow used moving blankets hung across the entire ceiling and walls, with a rug on the floor. The result? Clear vocals, minimal echo, and a tiny footprint. The tradeoff is cost and effort, but this coverage level strikes a balance between effectiveness and practicality. Remember, the goal is to tame the room’s worst reflections, not to make it sound like a studio. Check out [this article](https://www.secondskinaudio.com/soundproofing/furnace-closet-soundproofing/) for more ideas on coverage.
How to Seal Gaps and Stop Sound Leaks in Your Closet
Gaps around the door and vents are sneaky sound leaks. Sealing these is low-hanging fruit and makes a huge difference in your overall sound isolation. Even small cracks can let in outside noise or allow your sound to escape, undermining your efforts at acoustic treatment.
Start with weatherstripping around the door frame; it’s inexpensive and easy to install. Use acoustic sealant or caulk to fill cracks and gaps around vents, electrical outlets, and any other openings. For the door itself, hang a heavy blanket or a thick curtain to seal the opening—this adds mass and absorbs sound, further reducing leaks. The goal is to create an airtight barrier that prevents sound from slipping through.
For example, a podcaster I know sealed their closet door with weatherstripping and a moving blanket, reducing outside noise by nearly 50%. This simple step significantly enhances the overall soundproofing and clarity of recordings. The tradeoff is minimal effort for a big gain in sound isolation. For more tips, see [this guide](https://soundproofcow.com/how-to-soundproof-closet/).
Floor and Hard Surface Treatments to Reduce Echo and Muddy Sound
Hard floors and desks reflect sound, creating slap echoes and muddy recordings that reduce clarity. Without treatment, these surfaces can cause reflections that bounce sound waves unpredictably, muddling your recordings and making them less intelligible. Softening these surfaces is essential for a clean, professional sound.
Use rugs, carpets, or foam mats on the floor to absorb reflections. Hanging blankets or acoustic panels on nearby walls can further reduce echo. Even a thick curtain behind you can help tame reflections from your desk or workspace. The key is to break up the hard surfaces that cause sound waves to bounce and create muddiness.
For example, I placed a large rug in front of my mic and hung a blanket behind my desk. The difference was night and day — vocals sounded warmer and more focused, with less room echo. This combination of soft surfaces absorbs the reflections that contribute to muddy sound, resulting in clearer, more professional recordings. Check out [this article](https://www.sweetwater.com/insync/how-to-record-vocals-in-your-closet-and-other-creative-tips/) for more ideas on surface treatment.
Frequently Asked Questions
What’s the biggest mistake people make when setting up a closet booth?
Most people focus on buying foam and forget about sealing gaps and proper placement. Without sealing gaps and treating reflection points, the sound remains muddy and leaks outside.How much treatment coverage do I need in a small closet?
Aim for covering at least 50-70% of the walls and ceiling with absorptive material. Layer blankets, foam, and rugs to deaden reflections and tame echo effectively.Can I put my computer in a closet without overheating?
Yes, but only if you add proper ventilation—install intake and exhaust fans, and ensure airflow. Proper cooling prevents heat buildup and keeps your rig quiet and safe.Should I treat the corners or focus on walls and ceiling first?
While corners help with bass trapping, in small closets, treating the entire space—walls, ceiling, and door areas—has a bigger impact on overall sound clarity.Is a closet booth good for vocals and streaming?
Absolutely, if properly treated and ventilated. It’s a budget-friendly way to get clean, focused recordings, especially when space is limited.Conclusion
Your best sound isn’t just about gear. It’s about smart placement, sealing gaps, and controlling reflections—simple tricks that turn a tiny closet into a professional-sounding space. Think of your closet as a blank canvas: with a few strategic moves, you can craft a recording environment that sounds pristine—even in the smallest corner of your home.
So next time you set up a mic, remember: distance, placement, and a little sealing go further than fancy foam. Your voice deserves a space that’s quiet, clear, and controlled—no fancy studio required.